|
|
|
|
We chose not to pour a concrete foundation as was done in the plans, but rather to use cinderblocks.
We continually checked the level and "scariness"of cinderblock foundation. This was critical as the entire
kiln structure would stand on the base. We used cinderblocks laid on their side so that there would be a good air
flow under/around the kiln. |
|
|
A course sand was used for the final leveling on the dirt floor and the cinderblocks seated
onto the it. We worked the cinderblock foundation one level at a time to ensure alignment and to make sure any
mistakes were caught before we went too far. In the picture you can see the last level is being finished and the
first level is having the kiln floor placed down. |
|
|
After the three levels of cinderblocks were completed, the kiln floor was started. A layer of
expanded metal was added between the cinderblocks and the kiln floor. The theory of this layer is to allow the
kiln to "float" above foundation and aid in detaching the kiln from the foundation to prevent any transfer
of movement/stress to the cinderblocks. |
|
|
The kiln floor consisted of two layers of soft brick and a final layer of hard brick. The bricks
were placed loosely (about a 16D nail apart) so that any expansion/contraction could be accommodated. In the vertical
walls that transition between the levels, an expansion joint of about 1/2" was created to again allow for
the eventual changes as the kiln was fired. |
|
|
The next phase was to build the two secondary fire boxes. This is a picture taken standing in
the main firebox, you can see the two secondary fire-boxes. We made sure that we selected the best bricks for this
portion of the kiln because the arches would rest on this structure, and we were diligent with making everything
square and level. |
|
|
We constructed the arch support out of a recycled piece of art (extra good karma). The arch
support was carefully aligned with the firebox/flue to ensure that the bricks would stack correctly. The arch bricks
were carried up to the site and sorted (square, 1A, 2A, etc.) so that the build could progress smoothly. |
|
|
Bricks in the arch (and walls of chambers) were dipped into a slurry mixture (50/50 fire clay
and grog) before being placed. As this mixture hardens during first firing it will add strength and reduce any
air flow/leaks. We built each arch separately and from both sides so we could manage ourselves up to the final
key bricks. |
|
|
The key bricks were cut by a local tile company (after eating through one diamond blade on our
skill saw) to our pattern and set into place. The arch form was laboriously moved out and the arch stood proud
on its own. In the photo you can see the two blow holes on the back-side of the first arch, and the flue and grates
of the second chamber's fire box. |
|
|
Once the first arch was completed the form was moved to the second chamber. The build progressed
much as the first arch except that we found ourselves running out of arch bricks. This required us to use less-than-ideal
bricks and eventually mix a heavy grog/mortar that we packed under flat brick to build up the angle. We saved the
arch brick for the top, building up to the key bricks. In this photo you can see the two completed arches from
what will be the main firebox. |
|
|
Once the two arches were completed we bricked up the back. In this photo both of the arch back
walls have been completed. You can see that we put in two "peep" holes in each chamber and one larger
stoke hole. The stoke holes will eventually have cast able closures made which will incorporate handles for easy
(and quick) access to the firebox. |
|
|
With the back walls completed on both arches we began to work on the front walls and doors,
and on the chimney. In this photo you can see the door frame has been placed in the first chamber and the wall
has been started. The chimney is slowly inching up and is being collared in to where the dampers will be installed. |
|
|
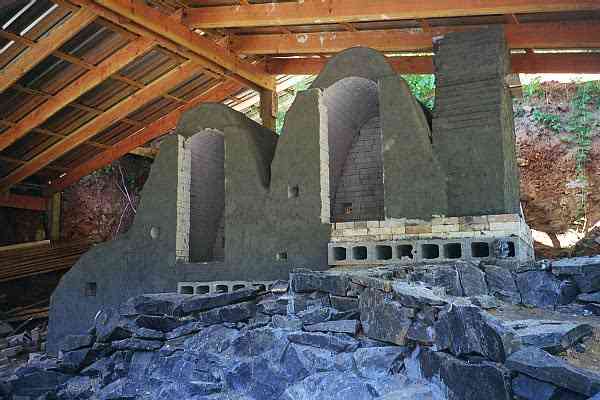
Both of the chamber front walls have been completed. You can see the double-brick wall construction
on the doors with one brick integrated inside the arch for alignment and support. The side stoke holes are visible.
Once completed the entire kiln will be covered in a multi-layer composite of fiber, mortar, and chickenwire. |
|
|
Focus turns to the firebox and the stack. The firebox walls go up quickly (old hands at laying
brick by now), but there is discussion about the roof ... plans call for arch bricks, but we're down to the dregs
... so we build a sprung arch with the best of the rest. Recycled stainless steel tubes for firebox grating. |
|
|
Planning to do salt firing in the second chamber, we invest in some ITC to spray. Coating the
insides will significantly improve the life of the brick ... we have extra so we continue and ITC the other chamber
and the firebox. The chimney is completed past the dampers - up until it touches the metal roofing. |
|
|
You can see the completed firebox with stoke holes. We covered the entire top of the kiln (firebox
and both chambers) with two layers of Kaowool ceramic fiber for insulation. This was then coated with a thin layer
of a cement mixture to prevent the fiber from collapsing as we added more structure. |
|
|
The first layer of cement mix was covered with chicken wire which wrapped around the fiber to
protect the edges. Then a final coat of cement-castable-grog mix was applied to the entire kiln exterior (Recipe). At this point the structure is complete
except for building the chimney up past the dampers and through the roof. |
|
|
The chimney stack is 15 feet from the kiln floor to the top! After cutting through the metal
roof and providing drainage for the rain run-off, we started to stack bricks. Again we mixed a slurry of grog,
fire clay, and a little cement ... each brick was dipped into the mixture and placed. The chimney grew one course
at a time as bricks were hauled up to the kiln site, carried up onto the roof, and walked up the ladder. |
|
|
As the stack grew taller, we decided against scaffolding and actually worked up the chimney
as we went. In the picture you can see Tea (wonderfully agile) as he levels a course of bricks. Each course was
set in place and he would stand on the bricks as he stacked the next row. Once the chimney was 15 feet tall we
had to rescue him from the top with a rather shaky ladder arrangement. But with the chimney completed ... we were
ready to call it finished! |
  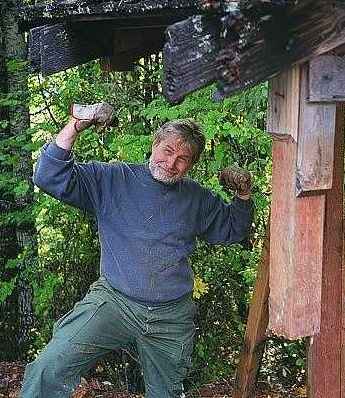  Now that the kiln
was officially done everyone got into the "swing" of things splitting up the wood we had gathered over
the months. Split - carry -stack went on till we had enough for our first
firing. Now that the kiln
was officially done everyone got into the "swing" of things splitting up the wood we had gathered over
the months. Split - carry -stack went on till we had enough for our first
firing. |
|
You can always contact me ... thanks for visiting ! |
|