 |
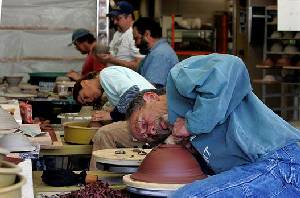
When I took my first pottery class I was taught to throw sitting down at the wheel. All the wheels in the studio were standard Brents with those fixed height stools. You adjusted yourself with pieces of shelving or the like under the chair legs or you simply bent over to accommodate the set-up. I threw like this for years and years ... I didn't know any better
Then in 2003 I ruptured my lower back bucking up some trees for firewood and had to have surgery. The benefit to this whole experience was that I learned about throwing standing up ... |
|
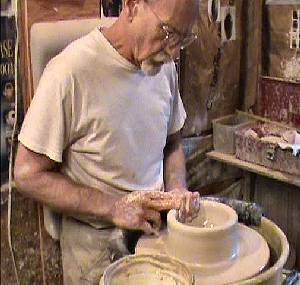 |
During my recovery I had the physical therapist come to visit my studio. After the initial shock of watching me mimic throwing sitting down, the therapist basically told me that I simply couldn't do that anymore.
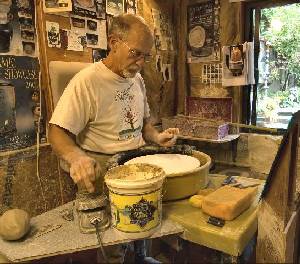
From now on I was going to have to throw standing up ... After the shock of the price of riser "legs" for my Brent, I decided I would simply design and build my own wheel set-up. Below is what my studio now looks like and hopefully enough information for you to build your own standing-up wheel. |
|
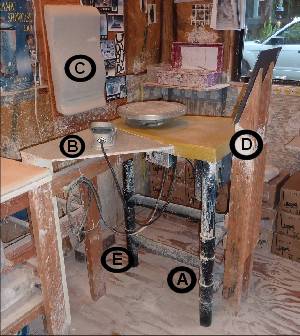 |
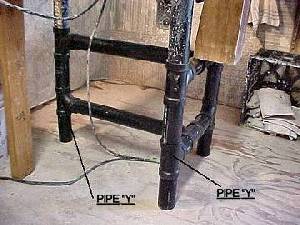
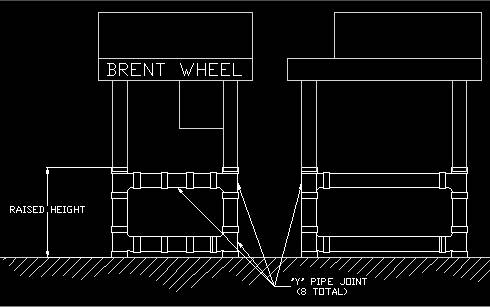
Designing and building my new "throwing standing up" set-up was done by trial-and-error (with lots of errors). The first thing I did was to build my own riser for the wheel (A). Serendipity was involved when I discovered that the inside diameter of standard ABS sewer pipe (not PVC plumbing pipe) was the same as the outside diameter of the Brent legs. The first thing I did was to design and build a riser/base from the ABS pipe as shown below. The design consists of eight " Y " pipe elbows and cut pieces of straight ABS sewer pipe. Care needs to be taken with cutting the pipe to length, but the entire project is really quite simple. Since the pictures below are somewhat small I have also provided a pdf file of the design which you can download and print from HERE. If you have any questions you can always contact me ... | |
 |
 |
|
 |
When I had finished the new set-up I had the physical therapist come back to admire my new "back friendly" design. She was shocked by what I had done ... as she stood watching me throw a piece she explained that, while I was in fact standing up (which was good for my back), I had created another problem with having to balance on one foot while my hips offset my back so I could free up my right foot to work the pedal. The answer was that I had to stand flat-footed on the floor.
The solution was a sturdy side table (B) on which I placed the "foot" pedal (which now became a "finger" pedal). Amazingly it only took a couple of days to get used to this strange new position. I discovered that I had simply gotten used to the infinite adjustability of the wheel speed when in fact it wasn't a necessity. Throwing comes down to basically three speeds ... really fast for the center/open, a little slower for the initial pulls, and finally slow for finishing. You can check this out for yourself when you watch my flash video of throwing a large salad bowl. |
|
| The last three components of my set-up came with time ... the back support and the mirror.
The back support (C) is a cloth covered, foam car accessory that is made to put on the driver's seat-back to give lumbar support (a lot of newer cars have a built-in adjustment but this was made for older models). I simply fit this to the small of my back, pressed it up against the wall, and stapled it in place ... not fancy, but the added comfort was great. The mirror (D) was added because I continued to find myself bending over to check the profile of a vase/etc as I threw or finished it. Throw enough in one day and your back gets sore from bending over repeatedly. So, the addition of a mirror attached to the wheel frame allowed me to see the profile in the mirror without continually bending over. Now I have to admit that this doesn't entirely eliminate the bending-over issue as I have never learned to trim by simply watching in the mirror and I sometimes I still bend (but less severely) to work on the outside form of large bowls (which you may notice in the flash video) ... Finally, I added a step-up (E) which is approximately 8" tall and provides the ability for me to step-up and have more leverage to press down while centering large amounts of clay. But today I continue to use this set-up and my back has been as good to me as I have been to it ... |
||